General Note about Images being Embedded/Used on a Website
When uploading images for use on your website, the images should be prepared separately for inclusion on a webpage and not be the originals from any digital camera.
A Note about CMS Crop Tools
Depending on your site's settings, some image fields may be configured to use the CMS's Manual Crop feature. This feature allows for defining various crops of one source photo. These crops in turn can be used for different layouts and templates featuring the selected content on the site. This tool is not intended to replace any pre-production tasks for images/graphics to be used on the website. The CMS image cropping tool is meant to serve for small alignment/crop adjustments and never for overall resizing of images. For recommended dimensions to crop/downsize to, refer to your individual image field settings for your CMS.
General Cropping Guidelines & Tips
When cropping photos for the web, you generally want to ensure your crop does not include any unwanted effects (such as random white space or borders). Depending on the design, you may want to apply a mask at the edges of the photo to ensure they all fade to a solid border or transparent edge. See "Scaling and Cropping Photos to Size" for examples of optimizing the photo's actual image/canvas size before saving for the web.
All photos being used for the same purpose should have a consistent orientation, size, and focal point. For example, all slideshow images might have to be in a landscape orientation, 600px wide by 400px tall, with the focus of attention at the bottom right of the image.
Recommended Image Formats
Image files should be one of two formats:
- PNG24 with Transparency (this should be used only for any images with opaque layers or transparent areas)
- JPG (preferred format, for flat images, no transparent or opaque filters in place; full color photos should be 72dpi, more basic iconography with only 3-4 colors can be less than 72dpi)
Be sure to disable any layers (including text that will be rendered via HTML) that are not part of the associated element. (For example, the header background would be separate from any overlaying logo or call to action buttons).
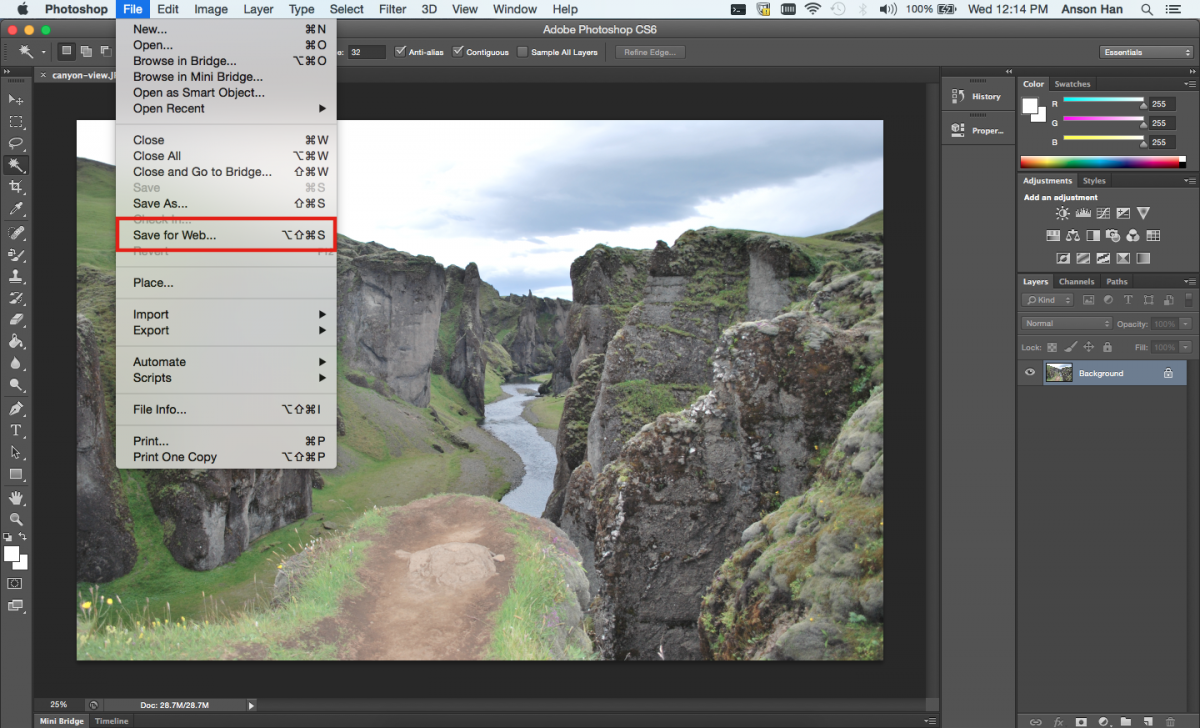
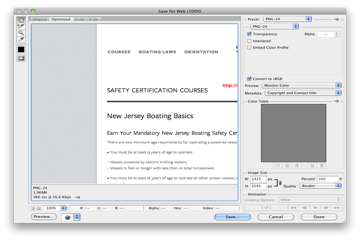
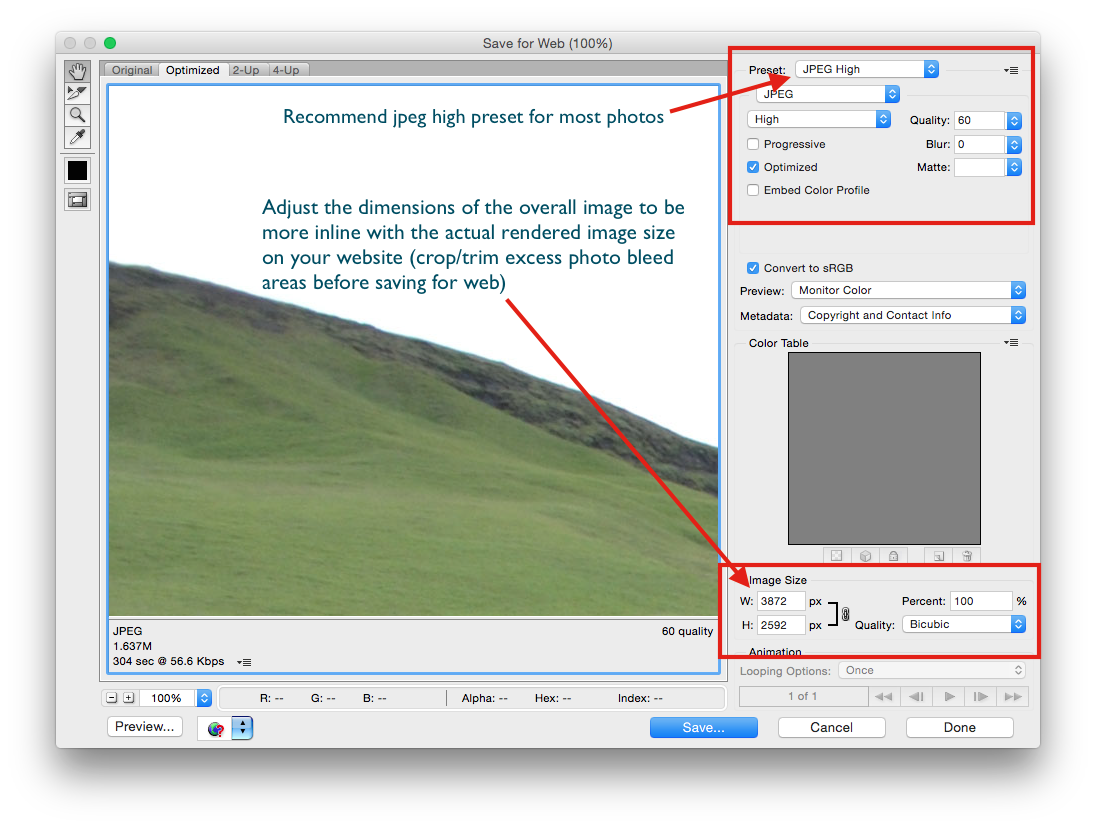
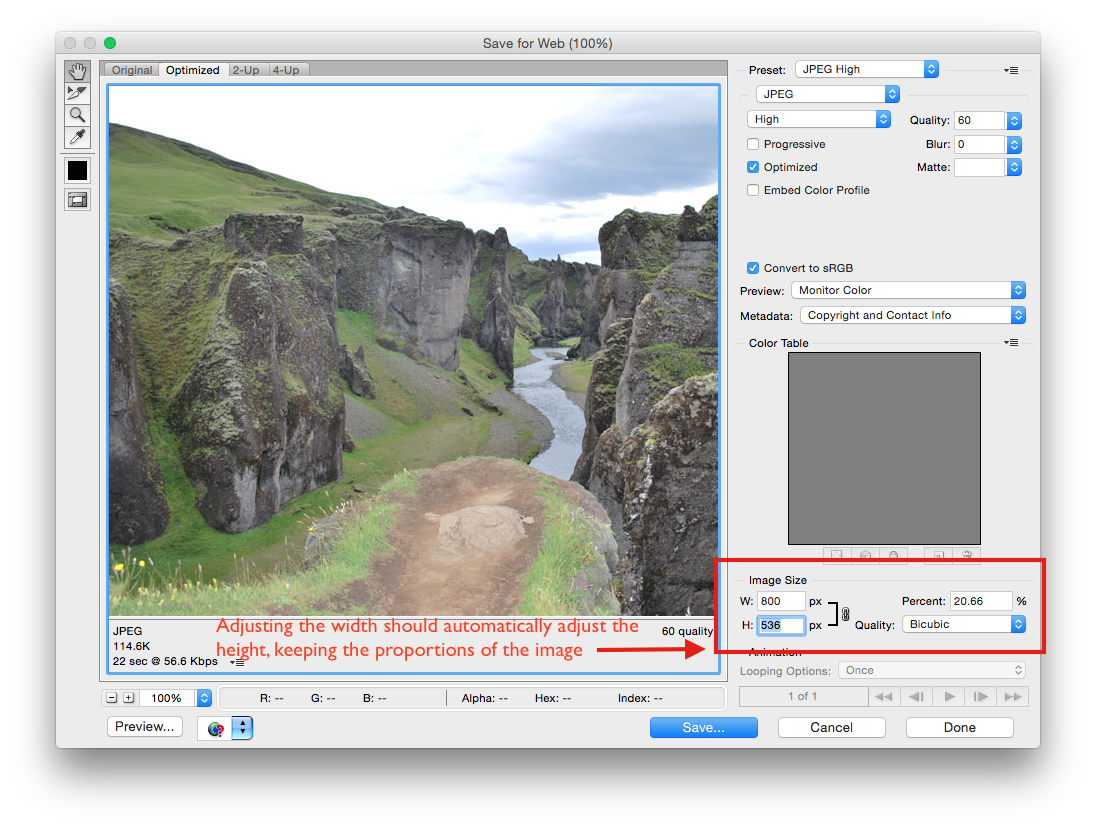
Saving For Web within Photoshop
If using Photoshop, you should compress/export via built-in SAVE FOR WEB (File->Save for Web) option. When naming the new file, avoid spaces and special characters other than a hyphen, and use lowercase letters only. [See Filenaming Conventions for tips.]
Once "saved for web", the picture file sizes should nominally be less than 1.5MB.
When saving for web from photoshop, the pictures should be downsized and saved at 60-70% compression in jpeg format as depicted in the series of screenshots below.